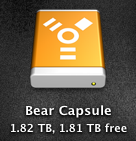
At home we have a Time Capsule for our laptops (and a mac mini) to automatically backup a few times a day. We got it shortly after it was released; and have been happy with it since whatever Leopard and firmware update it was that made backups work reliably. Between backups of Vani’s old MacBook, her new 13” MBP (very shiny) and my MBP (with a newly upgraded 500GB disk) the 1TB disk finally got filled up. I tried deleting some old backups; but basically there’s just too much data.
 Fortunately the wizard making hard drives have come up with magical 2TB disks recently. That’s about 2,000,000 megabytes.
(Update summer 2010: Last summer a 2TB disk cost more than $200; now it’s getting really close to $100!) I like Western Digital disks because their warranty process is really easy, at least in the United States. I don’t know if they break more or less than other disks; but all disks eventually break.
To replace the disk I followed the hardmac.com instructions with a few modifications.
Because our Time Capsule have been running for a year and a half, the glue on the “rubber protection” had mostly hardened and it was hard getting the rubber off without tearing it completely to pieces. Keep a knife handy.
I didn’t want to start over on our backups, so I put the new disk into the TC; started it up and formatted the disk with the Airport Utility. I didn’t bother reassembling it for this stage, because after formatting I removed the disk again and put it (and the old disk) into external enclosures and used Super Duper to copy the old disk to the new. You could also should use rsync (/usr/bin/rsync -avPE "/Volumes/Old TC" "/Volumes/New TC"), because Super Duper will miss some “hidden” files that Time Machine needs to operate.
It’s still copying (estimated time to completion: 16 hours, yikes!), so I haven’t put it back together yet; I’ll update the post when I have and checked that the backups resumed as expected. (Update: Yup, the rsync worked fine - after putting the drive back everything was in place the same as on the old drive; except with twice the space).
Two “AP*” partitions will show up as well for each disk when you plug them in; just ignore or unmount those.
Footnote
We use Time Machine Editor to configure Time Machine to only run every N hours instead of every hour which is a bit much.

Is there a difference in networking power or features with the new 1&2 TB models from apple?
Or are they essentially the same just w/ bigger drive capacities
So, was your transfer using rsync successful? I need to upgrade my time capsule hard drive soon and am hoping to gather as much information as possible before diving in.
Hi Stephen,
Yes - the rsync worked well!
Only caveat is that my MBP still sees its backup disk image as 1TB (from the old disk size). I think you could get it resized with the command line diskutil tool; but I prefer it this way to make sure the other computers don't get "crowded out".
- ask